Sunday, September 18, 2011

Lasagna AKA Pizza Noodles


 With the beautiful fall weather this weekend we wanted a hearty and warm dinner.  Lasagna was the first thing that popped into my mind and knowing our Hungry Hungry Jacob, we knew it would be an instant hit (well, we at least thought). 

We used the Simple Lasagna with Hearty Tomato sauce from Cooks Illustrated.  It was DELICIOUS! However, Jacob was a little resistant to try it until he really studied it for a minute and then declared they were called Pizza Noodles.  Once we all agreed we were eating Pizza Noodles, they were gone quicker then we could blink.  Definitely on the rotation of weekend meals in this house!

This made a ton of food! Instead of packing it up for lunch or leftovers for the entire week, I reserved enough for one more family meal and then cut up toddler lunch portions for the rest.  I froze the lunch portions on a baking sheet and once frozen wrapped in saran wrap, tin foil and then put in a freezer bag for 6 toddler lunch / dinners when needed in a pinch.  Now Jake can have his Pizza Noodles anytime!

Individually Frozen Pieces


From Cooks Illustrated:
If you can’t find meatloaf mixture for the sauce, or if you choose not to eat veal, substitute 1/2 pound ground beef and 1/2 pound sweet Italian sausage, casings removed, for the meatloaf mixture. The assembled, unbaked lasagna, if wrapped tightly in plastic wrap and then in foil, will keep in the freezer for up to 2 months. To bake, defrost it in the refrigerator for a day or two and bake as directed, extending the baking time by about 5 minutes.

Ingredients

Tomato-Meat Sauce
  • 1tablespoon olive oil
  • 1 medium onion , chopped fine (about 1 cup)
  • 6medium cloves garlic , pressed through garlic press or minced (about 2 tablespoons)
  • 1pound meatloaf mix or 1/3 pound each ground beef chuck, ground veal, and ground pork (see note)
  • 1/2teaspoon table salt
  • 1/2teaspoon ground black pepper
  • 1/4cup heavy cream
  • 1 can (28 ounces) tomato puree
  • 1 (28-ounce) can diced tomatoes , draine
Ricotta, Mozzarella, and Pasta Layers

Instructions

  1. Adjust oven rack to middle position and heat oven to 375 degrees.
  2. Heat oil in large, heavy-bottomed Dutch oven over medium heat until shimmering but not smoking, about 2 minutes; add onion and cook, stirring occasionally, until softened but not browned, about 2 minutes. Add garlic and cook until fragrant, about 2 minutes. Increase heat to medium-high and add ground meats, salt, and pepper; cook, breaking meat into small pieces with wooden spoon, until meat loses its raw color but has not browned, about 4 minutes. Add cream and simmer, stirring occasionally, until liquid evaporates and only fat remains, about 4 minutes. Add pureed and drained diced tomatoes and bring to simmer; reduce heat to low and simmer slowly until flavors are blended, about 3 minutes; set sauce aside. (Sauce can be cooled, covered, and refrigerated for up to 2 days; reheat before assembling lasagna.)
  3. Mix ricotta, 1 cup Parmesan, basil, egg, salt, and pepper in medium bowl with fork until well-combined and creamy; set aside.
  4. Assemble first lasagna layer according to illustrations below. Repeat layering of noodles, ricotta, mozzarella, and sauce two more times. Place 3 remaining noodles on top of sauce, spread remaining sauce over noodles, sprinkle with remaining cup mozzarella, then with remaining 1/4 cup Parmesan. Lightly spray a large sheet of foil with nonstick cooking spray and cover lasagna. Bake 15 minutes, then remove foil. Return lasagna to oven and continue to bake until cheese is spotty brown and sauce is bubbling, about 25 minutes longer. Cool lasagna about 10 minutes; cut into pieces and serve.

    Jacob Approved!


    Assembling Lasagna - From Cooks Illustrated:
1. Smear entire bottom of 9- by 13-inch baking dish with 1/4 cup meat sauce. Place 3 noodles on top of sauce.

2. Drop 3 tablespoons ricotta mixture down center of each noodle. Level by pressing flat with back of measuring spoon


3. Sprinkle evenly with 1 cup shredded mozzarella.

4. Spoon 1 1/2 cups meat sauce evenly over cheese.

Carrot Pineapple Muffins

We made these this weekend, thanks to the recipe from Weelicious.  They weren't to bad ... I got the thumbs up from Jake and Grandpa Johnny too!


Pineapple Carrot Muffins (Makes 14 Muffins)
1 1/4 Cup All Purpose Flour
3/4 Cup Wheat Flour
2 Tsp Baking Powder
1/2 Tsp Baking Soda
1/2 Tsp Salt
1/2 Cup Butter, melted
1/2 Cup Honey
2 Eggs
1 Tsp Vanilla Extract
1/2 Cup Pineapple, chopped fine and drained well OR 1 8 oz Can Crushed Pineapple, drained well
1 Cup Shredded Carrot (about 2 Large Carrot)

1. Preheat oven to 350 degrees,
2. In a large bowl combine the flours, baking powder, baking soda and salt.
3. In a separate bowl combine the butter and honey using a whisk.
4. Add the eggs and whisk to combine.
5. Add the vanilla, pineapple and carrots to the butter mixture.
6. Stir in the dry ingredients, making sure not to over mix.
7. Scoop the batter into regular size, paper lined muffin cups.
8. Bake for 22 minutes or until a toothpick comes out clean.
9. Cool and serve.

Tuesday, September 6, 2011

Peach Puree

Super easy ... you won't buy a canned peach puree again.

1. Cut ripe peaches in half and take out the pit. 
2. Place face down in a glass baking dish with 1/4 inch water, cover with saran wrap and microwave on high for 3 minutes.
3. Remove saran wrap, flip over each peach half, recover and microwave on high for 2 minutes.

4. Test peach for for softness (each should easily been mashed with a fork).  If additional time is needed, recover and cook at minute increments (shouldn't take more than 6-7 minutes).
5. Remove outside skin (should easily be removed after they are steamed) and puree in a food processor.  Add water (from steam container) as needed until reach desired consistency. 

Here I added the peach puree to previously made applesauce for our very own apple peach sauce! YUM!

Applesauce

I couldn't let a FULL year go by without posting, so here's a stab at bringing Hungry Hungry Jacob back to life! Now that fall is on it's way, I'll be headed back into the kitchen more often (also see: happy husband).

This is a recipe I've been making for a while, just in the fall time when we head up to our favorite apple orchard, Bolton Spring Farm in Bolton, MA.  This past weekend we picked up 3 bags of great applesauce apples made up of Paul Red and Gravenstein apples. 

Ingredients
12 - 14 apples cored and quartered
1/2 cup water (more if needed)
3 tablespoon dark brown sugar
2 teaspoon cinnamon
1/2 lemon, squeezed
1/4 teaspoon salt


Tip for cutting apples: I saw this tip on Food Network and it does save a lot of time.  Since you want to keep the peels on the apples (for extra flavor), cut the apples in quarters:

Holding the apple quarter, slice off the core:
 And voila... you have a cored, quartered apple!
1. Over medium heat, simmer all ingredients for 15 minutes.  

Keep an eye on the water level, it the apples appear dry, add another 1/2 cup of water.  Gravenstein and Paul Red apples break down quickly and expel a good amount of water, so only a 1/2 cup was need for this recipe.

Stir and mash the apples until each apples breaks down:
 
2. Once the apples are soft, take off the heat to cool.
3. Spoon the apple mixture into a ricer and squeeze the applesauce into a clean bowl.  The ricer will leave the peels behind.  Continue until you have processed all of the applesauce through the ricer.


4. Taste the applesauce for sweetness and cinnamon.  Add additional brown sugar or cinnamon as needed.

5. This batch made A LOT of applesauce.  I kept a portion in the fridge for us to eat during the week and froze in individual batches for Jacob's school lunches.  I found the best way to freeze portions for my hungry toddler in muffin tins.  Spray the muffin tin with Pam Non-Stick spray, spoon the applesauce into the muffin tin and cover (once cooled) with saran wrap and tin foil.  Once froozen, pop out the individual portions to a freezer bag and defrost individually.


Babyfood Puree Tip: I easily did this recipe when I was making Jacob's fruit purees.  I would omit the sugar, cinnamon and salt and cook as indicated above.  I would continue to use the ricer to remove the apple peels, but then run the applesauce through a food processor until I reached the appropriate consistency.  You can add additional water as needed.

Tuesday, September 28, 2010

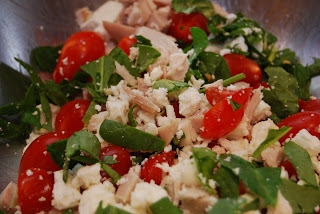
Orzo Super Salad


One of hungry hungry Jacob's favorite blogs, mish + mash homemade baby food just posted this recipe.  I decided to try it tonight, and it was an instant hit. 

Ingredients
1 1/2 cups uncooked orzo pasta
1 cup grape tomatoes
1 cup crumbled feta cheese
1/4 cup chopped fresh baby spinach
2 tablespoons lemon juice
½ tablespoon Chia Seeds (optional, can be found at wholefoods)
2 tablespoons olive oil 
1 cup shredded chicken (optional - I used left overs from the previous nights dinner)
salt & pepper to taste

Directions

1. Bring a large pot of lightly salted water to a boil. Add pasta and cook for 8 to 10 minutes or until al dente; drain. 

2. Whisk together lemon juice and olive oil. Place all ingredients into a large bowl and toss with the dressing. Season with salt & pepper to taste.


Jacob approved!

Fig Spread

I realized after I made the fresh fig puree for Jake's fig and cream cheese sandwich, it was good, but it wasn't exactly what I was trying to go for.  I wanted a fresh fig spread that tasted like the inside of a fig newton.  After some research on the internet I realized I needed to use dried figs and cook them to get a sweet fig spread.  This fig spread turned out perfect and will keep in the refrigerator for up to 1 month. 

Ingredients 
1 package (10 ounces) dried Calimyrna figs

3 tablespoons sugar

1 1/2 cups water

1 tablespoon fresh lemon juice


1. Stem dried figs and cut into 1/4-inch pieces (about 1 3/4 cups)


2. In a medium saucepan, combine figs with sugar and 1 1/2 cups water; bring to a boil. Reduce heat; simmer, covered for 15 minutes.  Remove lid and simmer until most of liquid has evaporated and figs are easily pierced with the tip of a sharp paring knife, about 15 - 20 minutes.


3. Transfer mixture to a food processor; add lemon juice. Puree until smooth. Store in refrigerator for up to 1 month.

Possible Ideas for uses for Fig Spread:

Fig & Cream Cheese Sandwich
Fig & Goat Cheese Sandwich
Spread on Toast, English Muffin or Waffle
Crackers and Cheddar Cheese

Sunday, September 26, 2010

New England Apple Pie


I love apple pie. Just love it.  I have made this recipe about 30 times total, and not even exaggerating.  My cousin Colleen gave me the cookbook,  The New England Cookbook: 350 Recipies from Town and Country, Land and Sea, Hearth and Home maybe 5 - 6 years ago, and we have only really tried the apple pie.  I've made it so many times that the cook book automatically opens up to page 599, for the only apple pie recipe you'll ever need, Apple Pie with Cheddar-Brown Sugar Crumb Crust.  Its really like a little piece of New England in your mouth ... apples, cheddar, apples .... mmmm, amazing.

I did learn a very good lesson over the past week.  Last weekend Jacob and I went to our local apple orchard, Bolton Spring Farm for two bushels of apples, and of course a half dozen apple cider donuts.  Side note, apple cider donuts are little gifts from God, they bring a tear of happiness to my eyes (and Jacob's too ... he was quite the fan!)    I went strictly off of memory on how to make the pie, and thought it called for 6 lbs of apples.  The pie was undercooked, watery and all around gross.  (A gross apple pie? Yes, in deed ... it was horrible and went uneaten in our refrigerator until our Sunday afternoon clean-out).  After I refused to admit defeat, I went to make the pie again this weekend trying to figure out what I did wrong.  The recipe actually calls for 6 cups of apples, CUPS, which equals to about 2 lbs of apples.  Big oops, on my part.  But 'old faithful pulled through and we enjoyed a yummy apple pie just as we have 29 other times in the past. 


I use the Cooks Illustrated Vodka pie crust to make my pies.  After getting frustrated with working with pie crusts that would be dry, bland and would crack when trying to roll it out, we tried the Vodka crust.  It only takes 2 tablespoons of Vodka (which cooks out and has no flavor), this crust is the easiest pie crust you'll ever work with.  The crust tends to sometimes be to wet, so you'll use up to 1/4 cup flour when rolling out the crust.

Pie Crust
Ingredients 
1 1/4 cups unbleached all-purpose flour (6 1/4 ounces)
1/2 teaspoon table salt
1 tablespoon sugar
6 tablespoons cold unsalted butter (3/4 stick), cut into 1/4-inch slices
1/4 cup chilled solid vegetable shortening , cut into 2 pieces
2 tablespoons vodka , cold
2 tablespoons cold water

Instructions

  1. Process 3/4 cups flour, salt, and sugar together in food processor until combined, about 2 one-second pulses. Add butter and shortening and process until homogenous dough just starts to collect in uneven clumps, about 10 seconds (dough will resemble cottage cheese curds with some very small pieces of butter remaining, but there should be no uncoated flour). Scrape down sides and bottom of bowl with rubber spatula and redistribute dough evenly around processor blade. Add remaining 1/2 cup flour and pulse until mixture is evenly distributed around bowl and mass of dough has been broken up, 4 to 6 quick pulses. Empty mixture into medium bowl.
  2. Sprinkle vodka and water over mixture. With rubber spatula, use folding motion to mix, pressing down on dough until dough is slightly tacky and sticks together. Flatten dough into 4-inch disk. Wrap in plastic wrap and refrigerate at least 45 minutes or up to 2 days.
  3. Remove dough from refrigerator and roll out on generously floured (up to ¼ cup) work surface to 12-inch circle about 1/8 inch thick. Roll dough loosely around rolling pin and unroll into pie plate, leaving at least 1-inch overhang on each side. Trim overhang to ½ inch beyond lip of pie plate. Fold overhang under itself; folded edge should be flush with edge of pie plate. Flute dough or press the tines of a fork against dough to flatten it against rim of pie plate. Freeze dough-lined plate until firm, about 30 minutes. I typically put this in the freezer when I'm preparing the apples. 
Apple Pie
For the crumbs
3/4 cup all-purpose flour
2 tablespoon brown sugar
2 tablespoon cold unsalted butter, cut in 1/2-inch pieces
1/3 shredded sharp cheddar cheese (use real cheddar cheese here, that you shred yourself)

For the filling
3/4 cup sugar
2 tablespoon all-purpose flour
3/4 teaspoon cinnamon
1/4 teaspoon nutmeg, preferable freshly grated
3 cups peeled, cored and thinly sliced tart crisp apples, such as Granny Smith (about 1 lb)
3 cups peeled, cored and thinly sliced sweet apples, such as McIntosh (about 1 lb)
1 tablespoon fresh lemon juice

1. To make the crumbs, pulse the flour and brown sugar in a food processor until no large lumps of sugar remain.  Add the butter and pulse until it is the size of small peas.  Add the cheese and pulse briefly, just until the entire mixture is the texture of rolled oats.  Refridgerate in a covered container for up to 3 days

2. Preheat the oven to 425 degrees.

3. Bake the frozen pie shell until pale golden brown, 14 minutes.  If the pastry starts to puff up, press the bottom gently with a large spoon or oven-mittened hand to flatten.  Cool on a rack for at least 15 minutes.  (The crust can be baked 1 day ahead.  Cover and store at room temperature).  Reduce the oven temerature to 375 degrees.

4. To make the filling, whisk together the sugar, flour, cinnamon, and nutmeg in a large bowl.  Add the apples and lemon juice, toss to combine, and let the mixture stand for 15 minutes, until the apples begin to soften.

5. Spoon the apples into the prebaked pie shell.  Sprinkle with the crumb mixture, making sure to cover the apples thoroughly and filling up and gaps and holes where the apples have sunk.  Bake until the crust is golden brown and the filling is soft and bubbly, 50 to 60 minutes.  Coll on a wire rack for at least 1 hour. 

6. Serve warm or at room temperature.
 
Related Posts with Thumbnails